Oracle Database’s Fine-Grained Auditing (FGA) is a powerful feature that enables organisations to monitor and audit database activities with precision. FGA provides the ability to audit specific columns and rows of tables based on content, enabling detailed scrutiny of database actions. In today’s rapidly evolving cybersecurity landscape, integrating FGA with a comprehensive security monitoring tool like Wazuh can significantly enhance an organisation’s security posture. This blog post explores the benefits of using Wazuh for Oracle FGA audit monitoring and provides a step-by-step guide on how to implement this integration.
Why Integrate Oracle FGA with Wazuh?
Before diving into the integration process, it’s essential to understand the benefits of combining Oracle FGA with Wazuh:
- Centralised Monitoring: Wazuh provides a centralised platform to monitor and analyse audit data from Oracle Database alongside logs and data from other sources. This centralised approach improves visibility and simplifies security management.
- Real-time Detection: By leveraging Wazuh’s real-time analysis capabilities, organisations can detect suspicious database activities as they occur, enabling immediate response to potential threats.
- Compliance and Forensics: Wazuh helps organisations comply with various regulatory requirements by ensuring that access to sensitive data is logged and auditable. Furthermore, in the event of a security incident, Wazuh’s forensic capabilities facilitate thorough investigations.
How to Integrate Oracle FGA with Wazuh
Integrating Oracle FGA with Wazuh involves several steps, from configuring Oracle FGA to collect the necessary audit data to setting up Wazuh to receive and analyse this data. Assuming that you have configured your Oracle FGA audit policies (we cover off this process here) the following steps need to be completed in Wazuh:
Step 1: Create Oracle Audit Extract Scripts
We create two scripts to extract the audit trail data:
- SQL script to extract the audit trail rows.
- Bash script to be called from the Wazuh agent.
Both of these scripts need to be created on your target Oracle database server host.
SQL Script
The script below uses a timestamp value from the last run to filter the audit records that have been created since the last execution of the extractor:
REM Script name should be /oracle/admin/scripts/audit/db_audit_fga_activities.sql to be called from the bash script below.

set heading off
set feed off
set trimsp on
set linesize 3000
col sql_text for a2000
alter session set container=PDB_NAME;
var run_date varchar2(64)
exec :run_date := '&1';
select 'orafga: session_id='||session_id||' entryid='||entryid||' client_id='||nvl(client_id, 'null')||' sql_text='||sql_text
from dba_fga_audit_trail
where timestamp  > TO_TIMESTAMP_TZ(:run_date,'DD-MON-RR HH.MI.SS.FF6 AM TZH:TZM')
order by extended_timestamp asc;
spool /var/tmp/db_fga_audit_timestamp.tmp
set term off
select systimestamp from dual;
exit
Bash Script
The bash script is called from the Wazuh agent at the required interval. The bash script is executed by the root user and switches to the oracle unix user to run the required SQL:
#!/bin/bash

sudo -i -u oracle sqlplus -s / as sysdba @/oracle/admin/scripts/audit/db_audit_fga_activities.sql "`cat /var/tmp/db_fga_audit_timestamp.tmp`"
Step 2: Configure Wazuh Agent Command Module
This step is to configure the Wazuh agent on the Oracle database server to call the Oracle Audit extractor scripts at the required interval:
1. Open the Wazuh agent config file:

vi /var/ossec/etc/ossec.conf

2. Add the following code block:

<wodle name="command">
    <disabled>no</disabled>
    <tag>orafga</tag>
    <command>/oracle/DBNAME/admin/scripts/audit/run_fga_audit_extract.sh</command>
    <interval>1m</interval>
    <run_on_start>yes</run_on_start>
    <timeout>0</timeout>
</wodle>

Note: I had to add this within the <ossec_config> tags to get it to work. This is an extract from my config file:

  <!-- System inventory -->
  <wodle name="syscollector">
    <disabled>no</disabled>
    <interval>1h</interval>
    <scan_on_start>yes</scan_on_start>
    <hardware>yes</hardware>
    <os>yes</os>
    <network>yes</network>
    <packages>yes</packages>
    <ports all="no">yes</ports>
    <processes>yes</processes>

    <!-- Database synchronization settings -->
    <synchronization>
      <max_eps>10</max_eps>
    </synchronization>
  </wodle>

  <wodle name="command">
    <disabled>no</disabled>
    <tag>orafga</tag>
    <command>/oracle/admin/scripts/audit/run_fga_audit_extract.sh</command>
    <interval>1m</interval>
    <run_on_start>yes</run_on_start>
    <timeout>0</timeout>
  </wodle>

  <sca>
    <enabled>yes</enabled>
    <scan_on_start>yes</scan_on_start>
    <interval>12h</interval>
    <skip_nfs>yes</skip_nfs>
  </sca>

3. Restart the Wazuh agent:

systemctl restart wazuh-agent.service
For the config parameters we set the following:
<tag>orafga</tag> (this will be matched on the Wazuh server for the decoder configuration).
<command>/oracle/admin/scripts/audit/run_fga_audit_extract.sh</command> (call a bash script – keeps the config simple and clean).
<interval>1m</interval> (run the audit extractor at 1 minute intervals. Consider your requirements around how urgent you need the audit data v SQL workload to extract the audit information).
<timeout>0</timeout> 0 (wait indefinitely for the extract SQL to complete)
Step 3: Configure Wazuh Server Rule
We assign the Oracle FGA audit records to the audit and audit_command groups. This will allow the Oracle audit trail records to be visible under System Auditing in the Wazuh dashboard.
Perform the following steps on the Wazuh server.
1. Add the local rule:

vi /var/ossec/etc/rules/local_rules.xml

2. Add the following config:

<group name="audit,audit_command,">
  <rule id="100010" level="6">
    <decoded_as>orafga</decoded_as>
    <description>Oracle FGA Audit Event</description>
  </rule>
</group>
For the config parameters we set the following:
<group name=”audit,audit_command,”> (assigns the extracted Oracle audit trail records to the audit and audit_command groups. Makes it easy to view and search these records in the Wazuh dashboard from the System Auditing menu).
<rule id=”100010″ level=”6″> (assigns the unique rule id and level – set as required for your environment)
<decoded_as>orafga</decoded_as> (sets the decoder name – this will be configured in the next step)
<description>Oracle FGA Audit Event</description> (set as required for your environment)
Step 4: Configure Wazuh Server Decoder
The Wazuh decoder parses and extracts the incoming Oracle audit records and extracts and assigns each field in the audit record to a Wazuh field. We do it this way to make it easy to search and report on different audit records.
Note: I have only included a subset of fields from the dba_fga_audit_trail view to keep this example simple.
1. Open the custom decoder config file:

vi /var/ossec/etc/decoders/local_decoder.xml

2. Add the following config:

<decoder name="orafga">
  <prematch>^orafga: </prematch>
  <regex type="pcre2" offset="after_prematch">.*session_id=(w+) .*entryid=(w+) .*client_id=(w+) .*sql_text=(.*)</regex>
  <order>session_id,entry_id,client_id,sql_text</order>
</decoder>

3. Restart the Wazuh server manager:

systemctl restart wazuh-manager
For the config parameters we set the following:
<decoder name=”orafga”> (matches the decoded_as parameter for the local rule created previously)
<prematch>^orafga: </prematch> (this matches the audit records coming from the SQL extract with the “orafga:” prefix)
<regex type=”pcre2″ offset=”after_prematch”>.*session_id=(w+) .*entryid=(w+) .*client_id=(w+) .*sql_text=(.*)</regex> (extract each of the fields from the Oracle audit row)
<order>session_id,entry_id,client_id,sql_text</order> (create the matching Wazuh fields for each audit record)
Want help implementing this in your environment? We configure Wazuh and Oracle audit integrations for organisations that need centralised monitoring across their database estate. Book a call ?
Step 5: View the Oracle Audit Trail in Wazuh
The following steps demonstrate filtering and viewing the Oracle audit trail records:
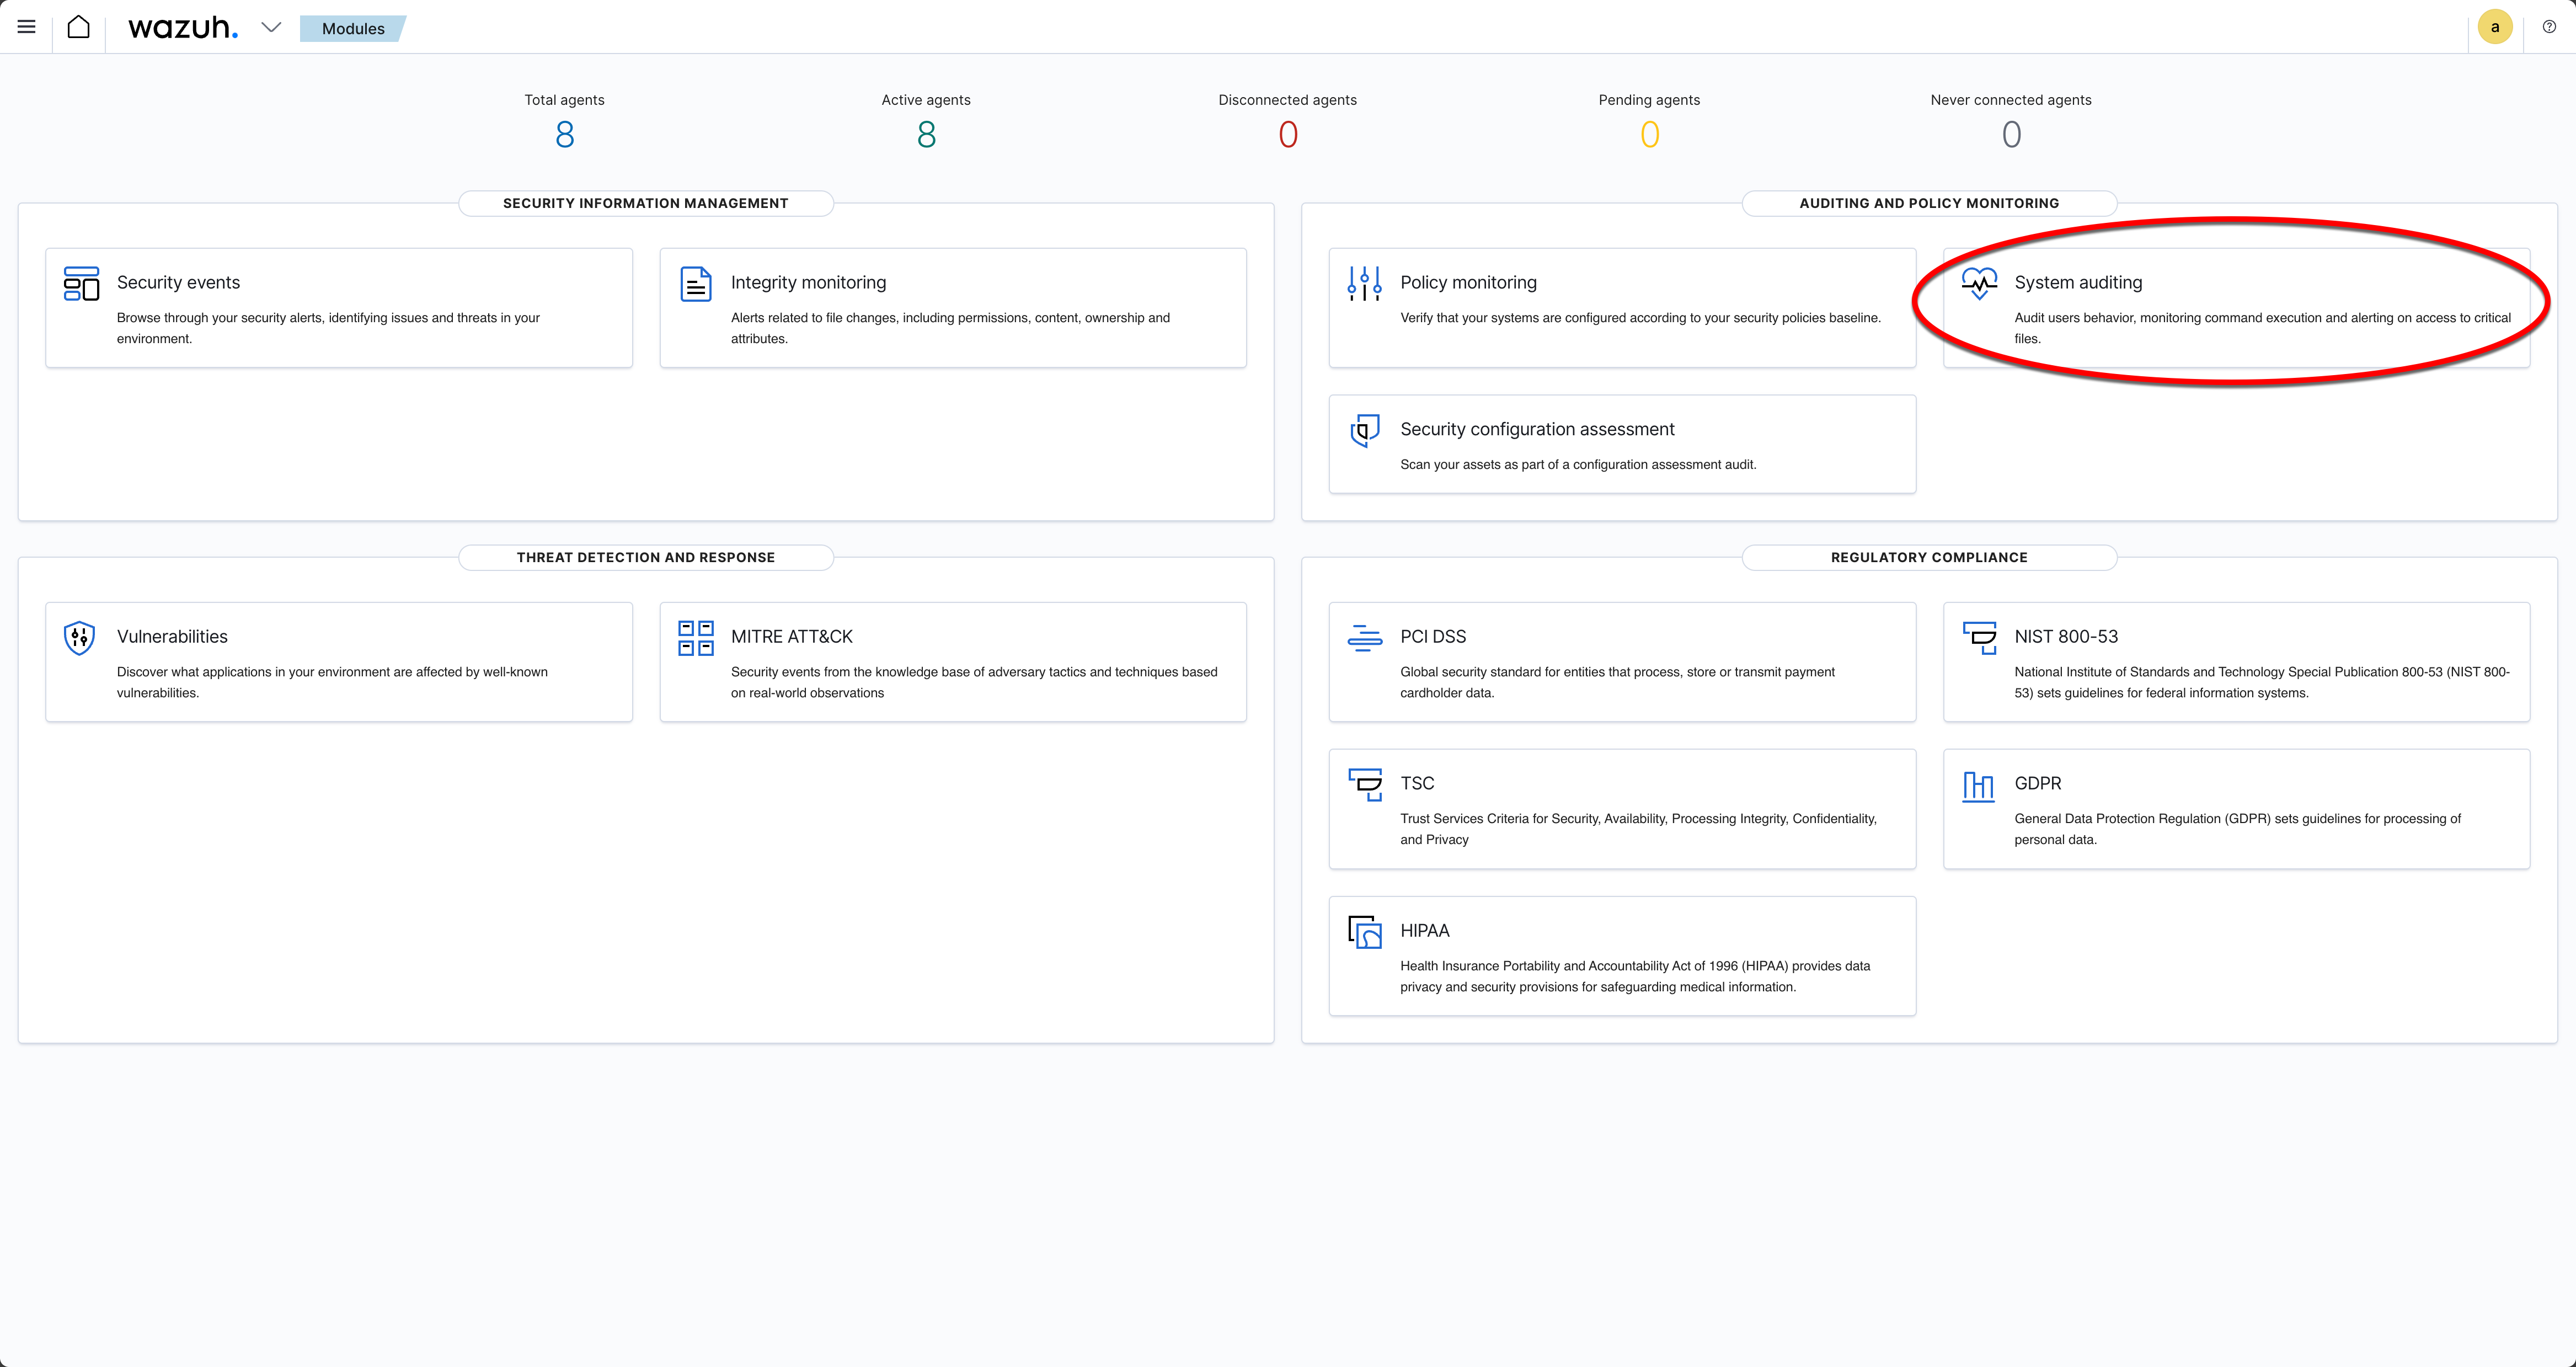
A: From the Wazuh dashboard select the System Auditing menu.
B: From the Agent filter select the Oracle database server host. This will filter any activities on the following screens to just that host.
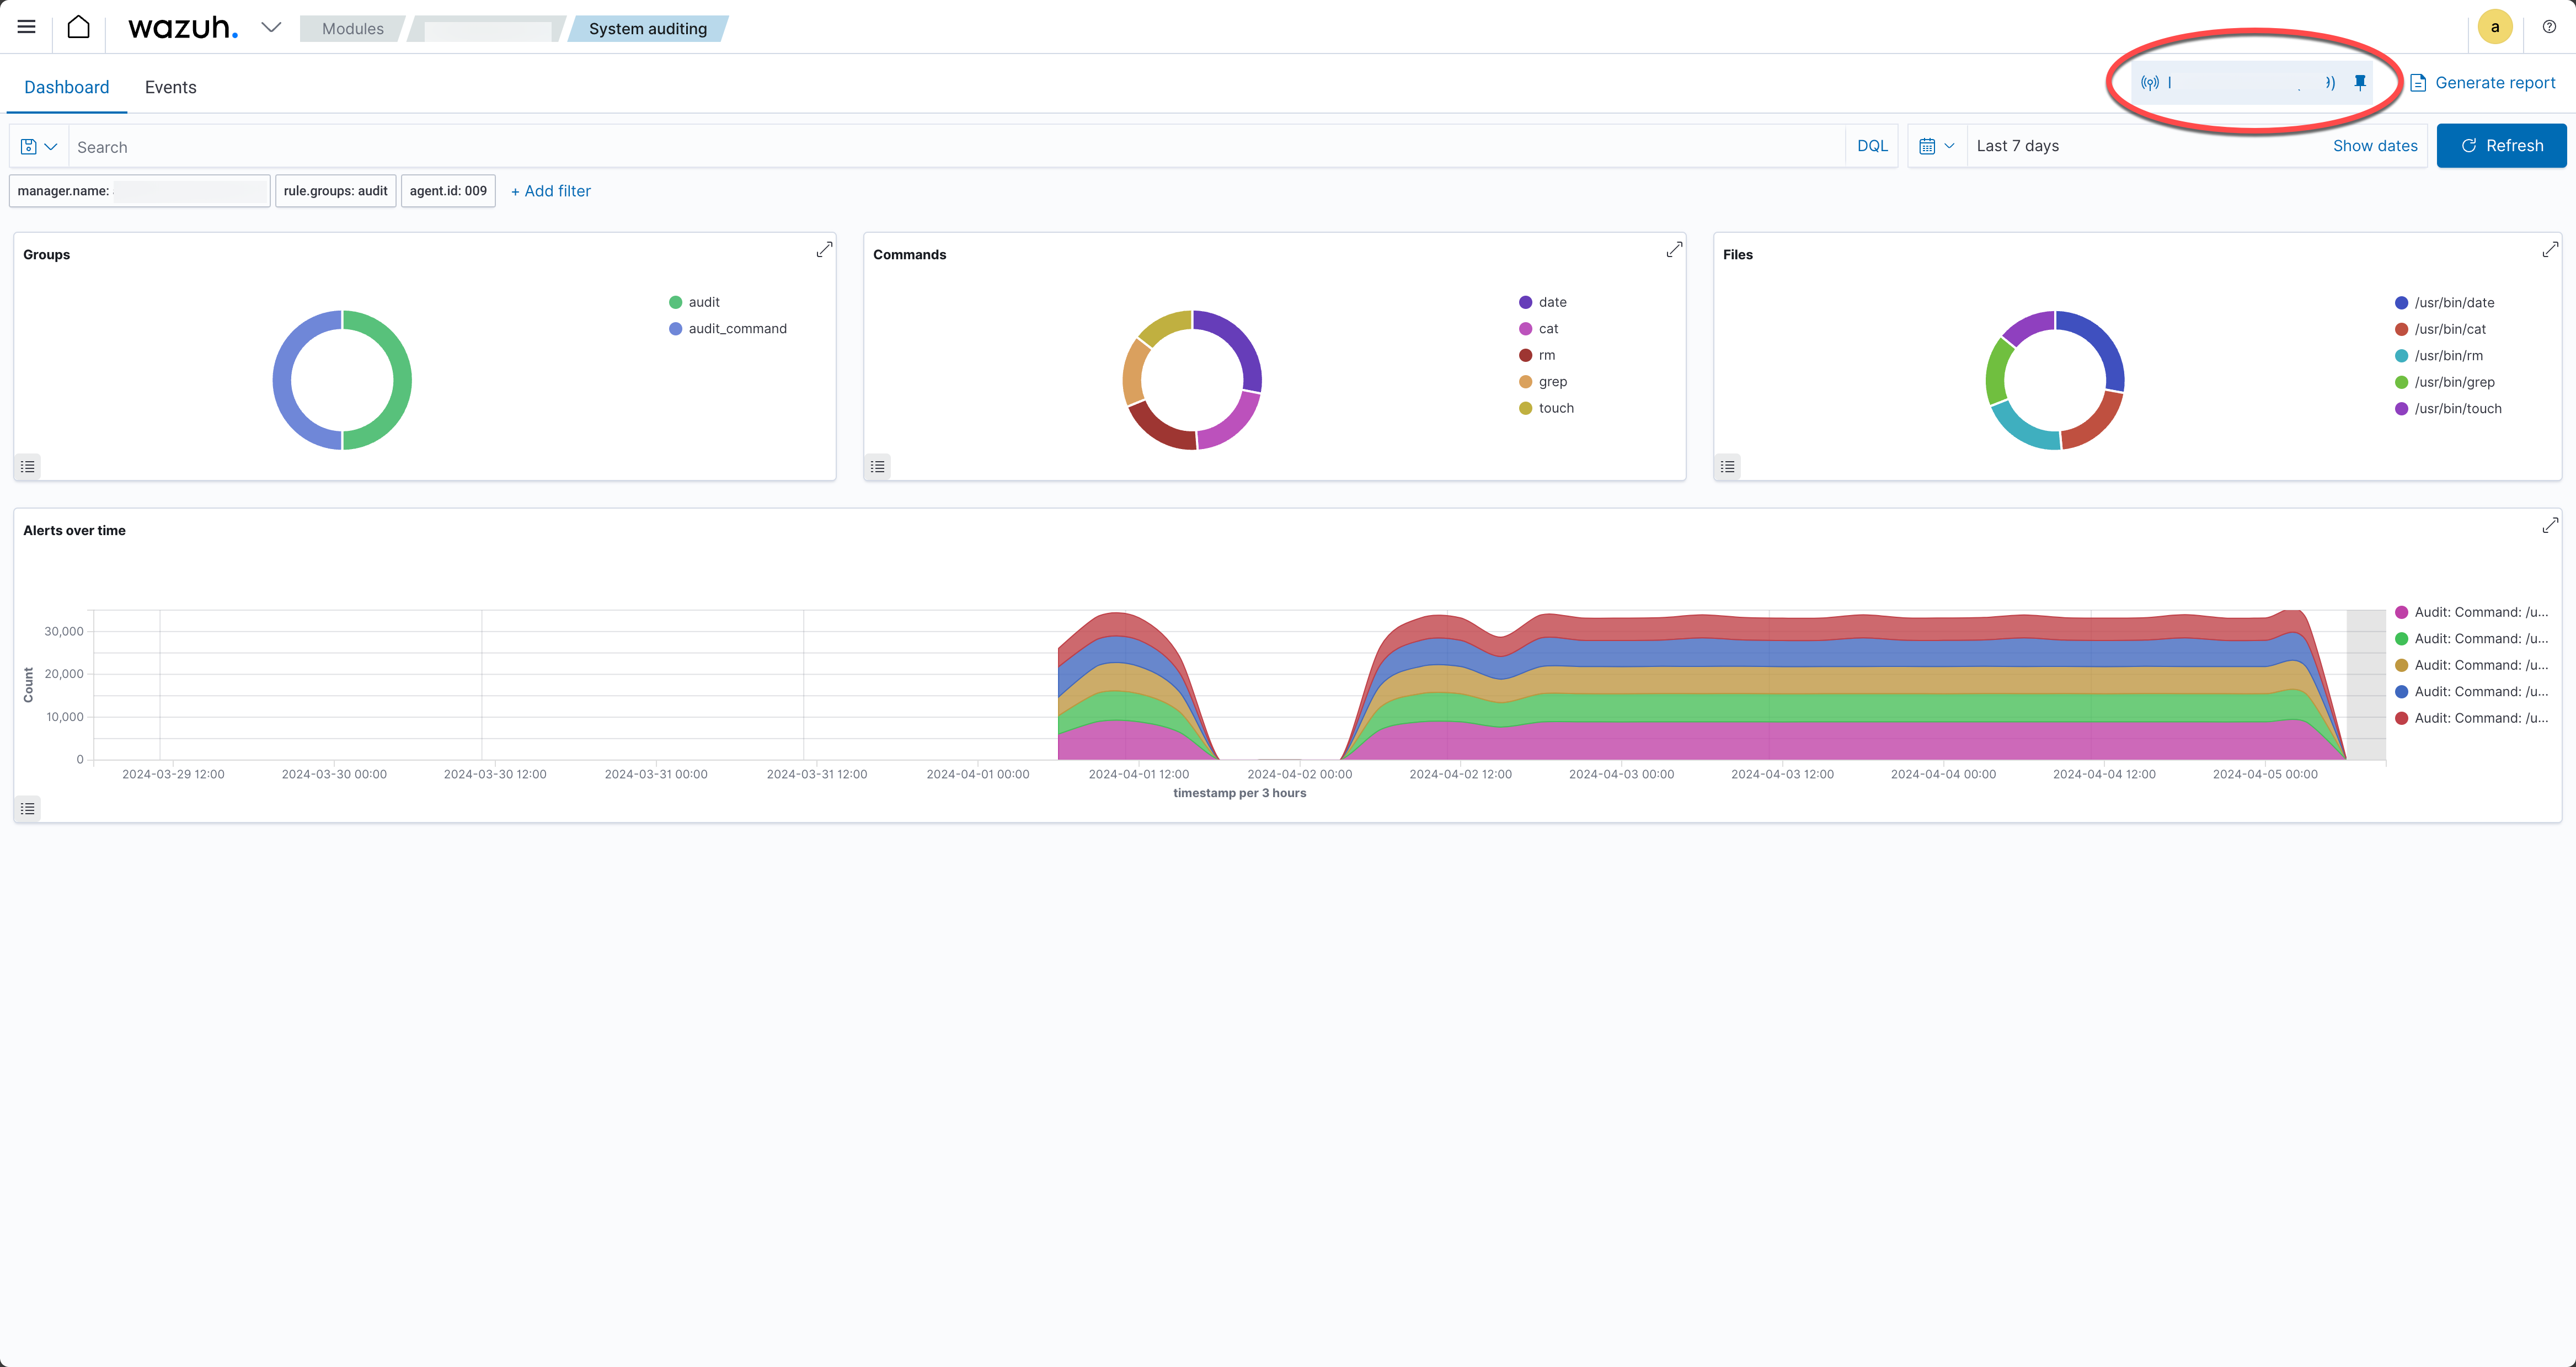
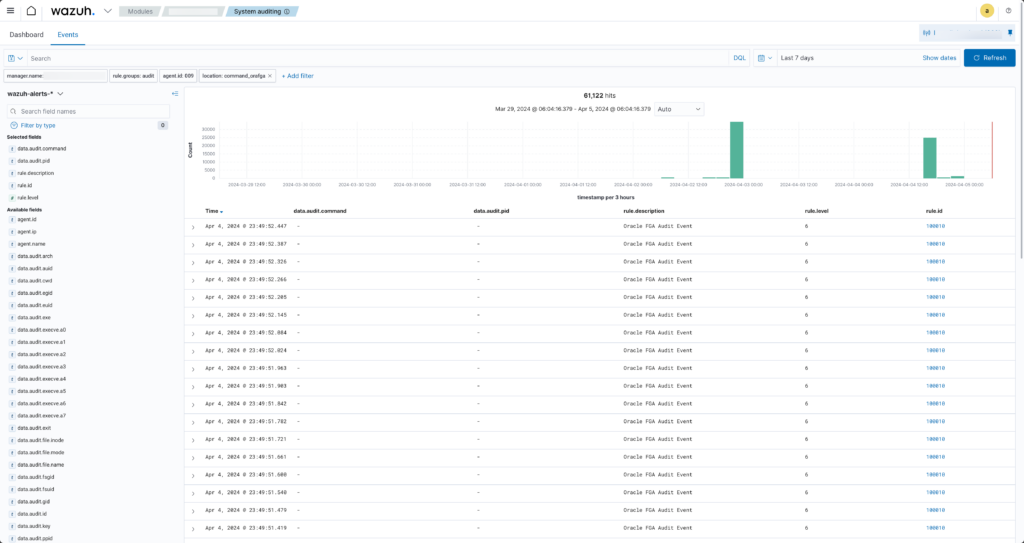
C: Select the ‘Events’ tab from the Audit dashboard screen. This should show all the audit related events.
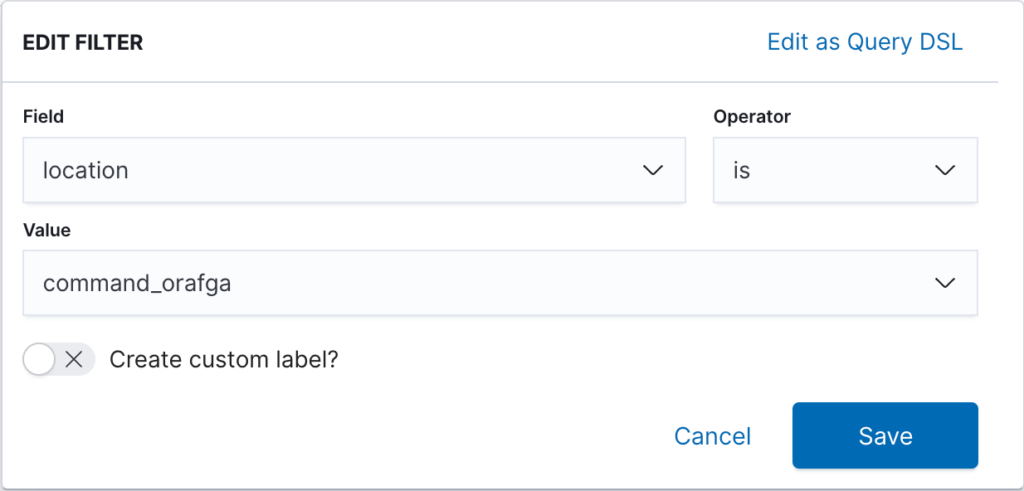
D: Click on the ‘+Add filter’ button to filter just the Oracle audit records. Note the field is “location” and the value is “command_orafga”.
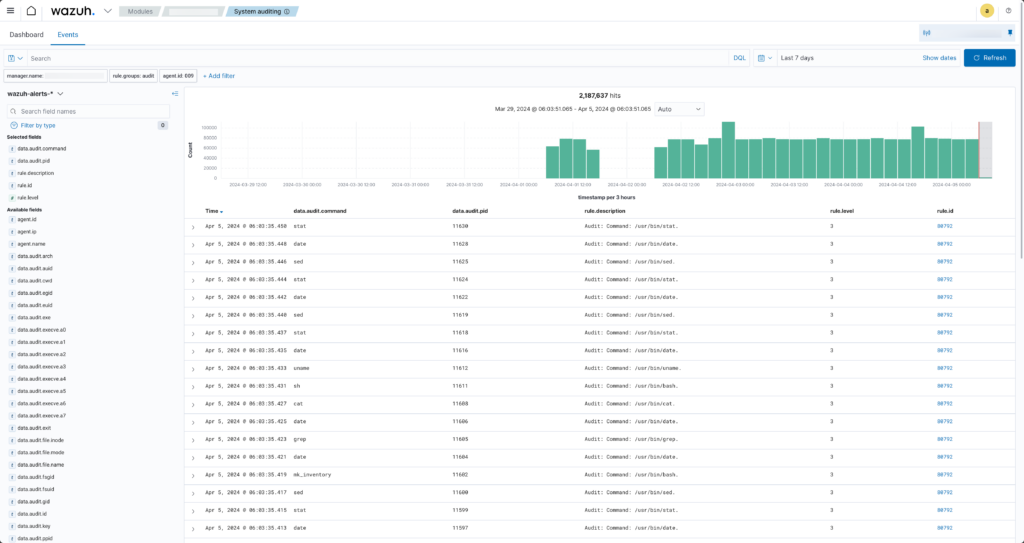
E: The events tab will show the Oracle audit records that have been loaded into Wazuh.
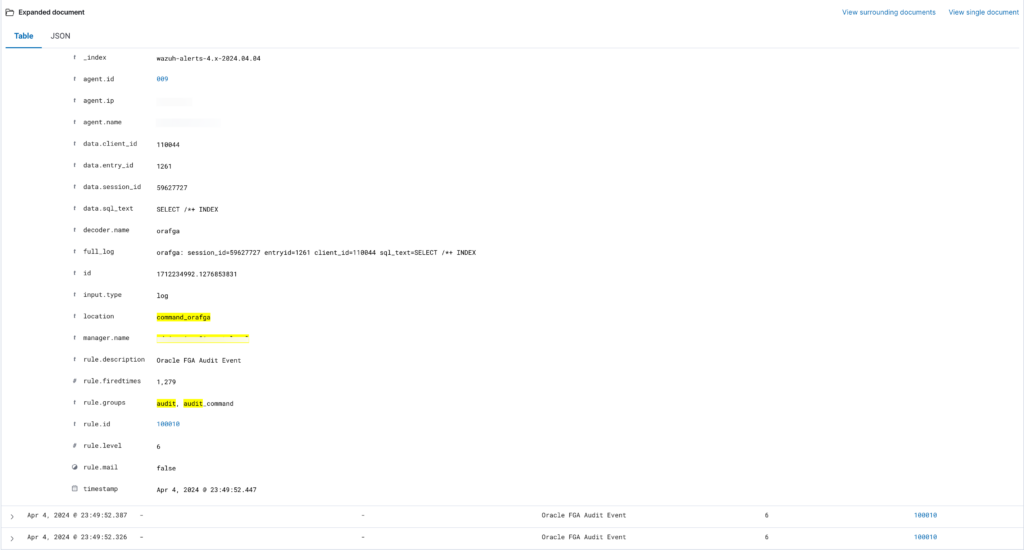
F: Expand and view the Oracle audit records. Note that the data.* fields contain the fields extracted from the Oracle audit record. You can filter, report, alert etc on the individual fields.
Conclusion
Integrating Oracle FGA with Wazuh provides a robust solution for monitoring detailed database activities and enhancing an organisation’s security and compliance posture. By following the steps outlined in this guide, organisations can achieve a comprehensive view of access to sensitive data stored in Oracle. This can help with the detection and response to potential threats more effectively. As with any security implementation, continuous review and adaptation are essential to maintaining an effective defence against evolving threats.
Need help securing your Oracle databases?
From Fine Grained Auditing and Unified Audit configuration through to SIEM integration and compliance reporting – we help organisations build audit frameworks that work in practice, not just on paper.
Book a Call ?


That’s just amazing How-TO, before I exported FGA to csv file – extra step and not quite compliant. Perfect – thx for writeup.
P.S.
in Wazuh you have to create decoder before rule.
You’re welcome – glad you found it helpful. I will also put together the steps to pull the OCI logs into Wazuh as well.